Note: you must be on either the LIDS wired network or the MIT SECURE wireless network to connect to these printers.
Driver Download
For the 6th floor copier, download and install the printer driver for Windows and go to the instructions below.
For the 7th floor copier, download and install this driver, and then go to the instructions for that printer.
6th Floor Printer Driver Installation
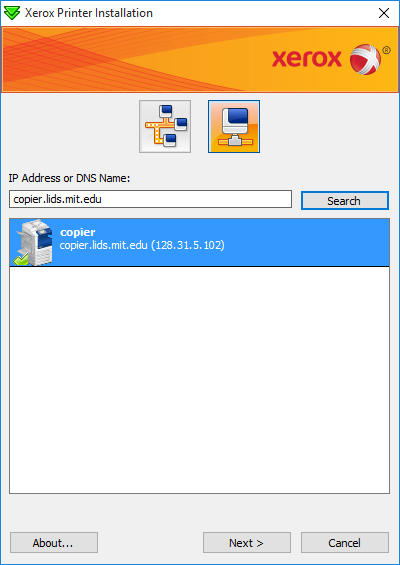
After accepting Xerox's licensing agreement, a window will open up and start searching for printers on your network. Click on the second icon in the top of the installation's window and enter copier.lids.mit.edu for the 6th floor copier (as shown below), then click 'Search':
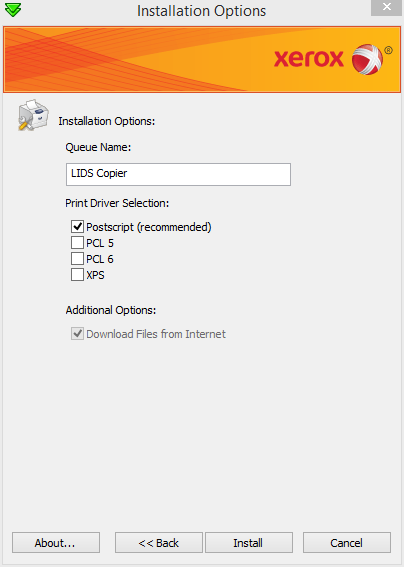
After selecting the copier, click 'Next' and you will see another window that will present you with some installation options. Enter the information as shown below and click 'Install'.
You should see another window pop up after the driver is finished being installed. Uncheck the box that says 'Set Printer As Default' (unless you want to use this as your default printer), and the box that says 'Print a Test Page' (as we haven't finished configuring the printer). Click 'Finish', and if you see another window about registering the printer, close it.
Configuration for the 6th floor copier
A passcode is required to print to the copier. To configure your driver to supply the proper code, open the Control Panel (In Windows 8 or 10, look for a key on your keyboard that looks like a Windows logo and hold that and the 'X' key down simultaneously and then select 'Control Panel' from the menu that pops up. In Windows 7, click on the Start button and select 'Control Panel'.)
Then click on 'Devices and Printers', and look for the printer we just installed (labeled 'LIDS Copier' if you followed the instructions above). Right-click on that printer and select 'Printer Properties'.
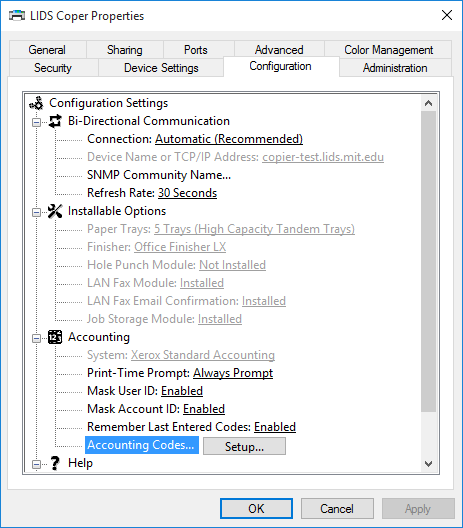
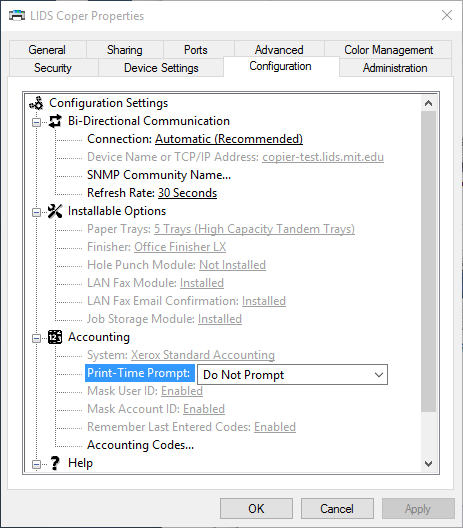
In the window that pops up, select the 'Configuration' tab, then look for the 'Accounting' section and next to 'Accounting Codes', click on 'Setup'.
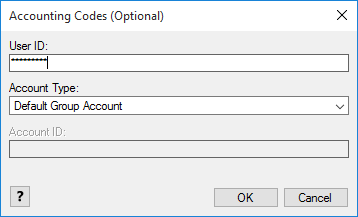
Enter the code you received from your Administrative Assistant into the User ID field, and make sure 'Default Group Account' is selected.
Click on 'OK', and then change 'Print-Time Prompt' to 'Do Not Prompt' (the settings should be the same as what is shown in the image below).
Click OK, and try printing something.
7th Floor Printer Driver Installation
After starting the installer, click on the button that says 'Don't see your printer?'. Then enter 'copier-7.lids.mit.edu' and click on Connect.

Then accept the defaults and change the Printer Name if you want:

Click 'Done' on the last page. The installer might try to download another app from the Microsoft Store, but feel free to click 'Done' anyway.

Configuration for the 7th floor copier
A passcode is required to print to the copier. To configure your driver to supply the proper code, open the Control Panel (In Windows 8 or 10, look for a key on your keyboard that looks like a Windows logo and hold that and the 'X' key down simultaneously and then select 'Control Panel' from the menu that pops up. In Windows 7, click on the Start button and select 'Control Panel'.)
Then click on 'Devices and Printers', and look for the printer we just installed (labeled 'LIDS Copier 7th floor' if you followed the instructions above). Right-click on that printer and select 'Xerox Printer Properties' .
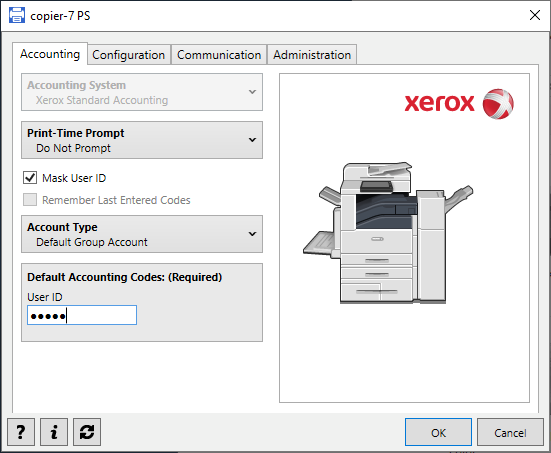
In the window that pops up, make sure the 'Accounting' tab is selected. Under 'Print-Time Prompt', select 'Do not prompt'. Make sure 'Mask User ID' is checked, and under 'Account Type', select 'Default Group Account'. Under 'Default Accounting Codes', enter your copier code into the 'User ID' box. Then click 'OK', and try to print something.
Please email Brian if you run into any problems or have any questions.